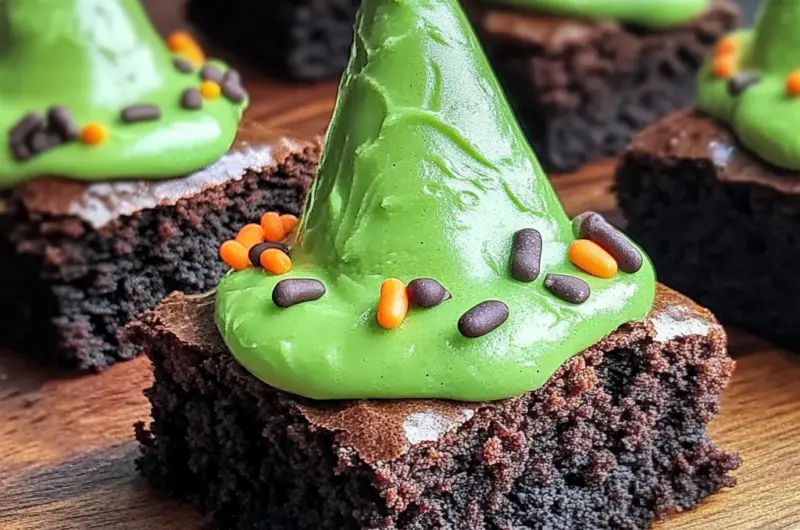
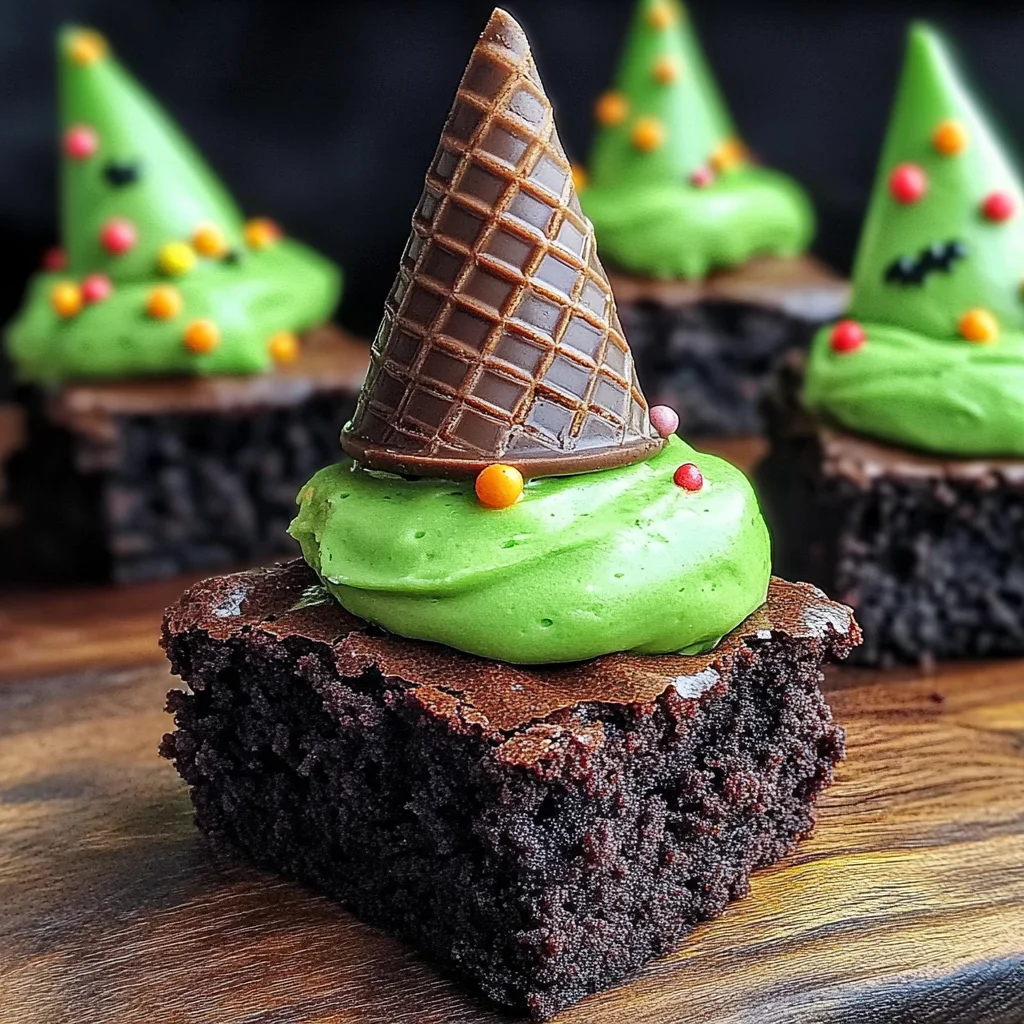
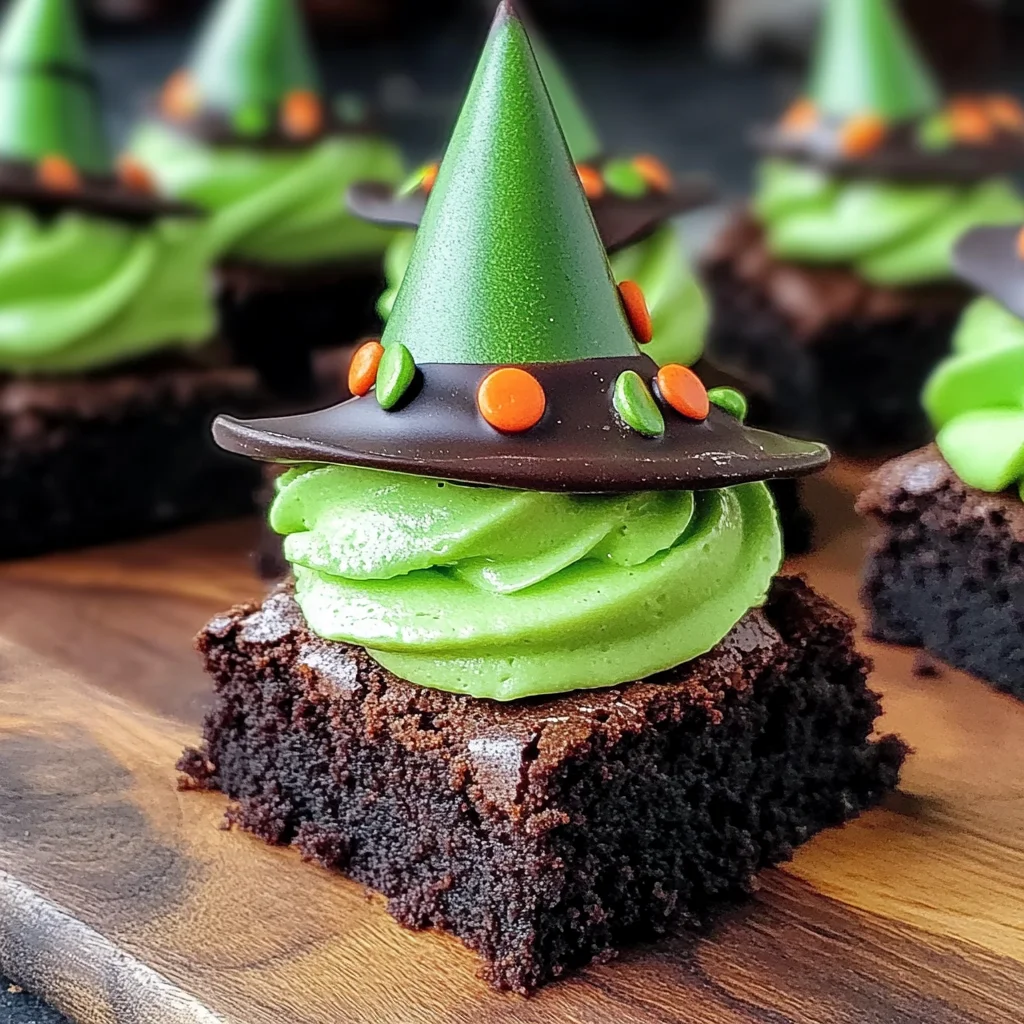
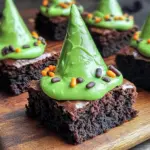
Wicked Witch Hat Brownies are a delightful Halloween treat that combines fudgy brownies with playful chocolate ice cream cones designed as witch hats. These spooky desserts are perfect for Halloween parties, school events, or just a fun family baking activity. With their vibrant green frosting and festive sprinkles, they are sure to impress both kids and adults alike!
Why You’ll Love This Recipe
- Fun Presentation: The unique witch hat design makes these brownies a showstopper at any gathering.
- Easy to Make: This recipe is straightforward and great for bakers of all levels.
- Customizable Toppings: You can personalize the decorations with different sprinkles or colors to match your Halloween theme.
- Rich Flavor: The combination of fudgy brownies and sweet frosting creates a deliciously indulgent treat.
- Ideal for Sharing: With 12 servings, these brownies are perfect for sharing with friends and family.
Tools and Preparation
To create your Wicked Witch Hat Brownies, you’ll need some essential tools. Having the right equipment will make the process easier and more enjoyable.
Essential Tools and Equipment
- Mixing bowls
- Whisk
- Baking pan (9×13 inch)
- Spatula
- Wire rack
- Measuring cups and spoons
Importance of Each Tool
- Mixing bowls: Essential for combining ingredients thoroughly without mess.
- Whisk: Helps achieve a smooth batter by incorporating air into the mixture.
- Baking pan: The right size ensures even cooking for perfectly fudgy brownies.
- Spatula: Ideal for spreading frosting evenly over the cooled brownies.
Ingredients
To make Wicked Witch Hat Brownies, gather the following ingredients:
For the Brownies
- 1 cup (225g) unsalted butter
- 2 cups (400g) granulated sugar
- 4 large eggs
- 1 teaspoon vanilla extract
- 1 cup (125g) all-purpose flour
- 1 cup (90g) unsweetened cocoa powder
- 1/2 teaspoon salt
- 1/2 teaspoon baking powder
For the Witch Hats
- 12 chocolate ice cream cones
For the Frosting
- 2 cups (300g) powdered sugar
- 1/4 cup (60ml) milk
- 1 teaspoon vanilla extract (for frosting)
- Green food coloring
- Halloween-themed sprinkles
How to Make Wicked Witch Hat Brownies
Step 1: Prepare the Brownie Batter
Begin by melting the unsalted butter in a saucepan or microwave. In a mixing bowl, combine the melted butter with granulated sugar until smooth. Next, add the eggs one at a time, mixing well after each addition. Stir in the vanilla extract.
Step 2: Combine Dry Ingredients
In another bowl, whisk together the all-purpose flour, unsweetened cocoa powder, salt, and baking powder. Gradually fold this dry mixture into the wet ingredients until just combined. Be careful not to overmix.
Step 3: Bake the Brownies
Pour your brownie batter into a prepared 9×13 inch baking pan. Bake in a preheated oven at 350°F (175°C) for 25-30 minutes or until a toothpick inserted in the center comes out clean. Once baked, allow the brownies to cool completely on a wire rack.
Step 4: Prepare the Witch Hats
While your brownies cool, you can prepare your witch hats. Optionally dip the tops of each chocolate ice cream cone in melted chocolate and sprinkle with your choice of Halloween-themed sprinkles for added flair.
Step 5: Frost the Brownies
In a mixing bowl, combine powdered sugar, milk, vanilla extract, and green food coloring to create your frosting. Mix until smooth and spread over cooled brownies using an offset spatula.
Step 6: Assemble Your Treats
Place an upside-down chocolate ice cream cone on top of each frosted brownie. Finally, decorate with more Halloween-themed sprinkles to complete your Wicked Witch Hat Brownies!
Enjoy these delicious treats at your next Halloween celebration!
How to Serve Wicked Witch Hat Brownies
Wicked Witch Hat Brownies are not only delicious but also visually captivating. Here are some fun serving suggestions to make your Halloween gathering even more festive and enjoyable.
Individual Treat Bags
- Use small clear bags to portion out individual brownies topped with the witch hats. This makes it easy for guests to grab a treat.
Halloween Party Platter
- Arrange brownies on a spooky-themed platter, surrounded by candy corn or mini pumpkins for an eye-catching display.
Dessert Table Centerpiece
- Create a dessert table with Wicked Witch Hat Brownies as the centerpiece. Add other Halloween-themed treats to enhance the theme.
Ice Cream Pairing
- Serve brownies alongside a scoop of vanilla or mint ice cream for a delightful contrast in flavors and temperatures.
Hot Beverage Complement
- Offer hot chocolate or spiced cider as a warm beverage option, perfect for dipping the brownie hats into.
How to Perfect Wicked Witch Hat Brownies
Perfecting your Wicked Witch Hat Brownies can take your baking skills to the next level. Here are some tips to ensure they turn out amazing every time.
- Use Quality Ingredients: Select fresh eggs and high-quality cocoa powder for richer flavor and texture.
- Don’t Overmix: Mix the brownie batter just until combined to keep them fudgy and moist.
- Check for Doneness: Use a toothpick; it should come out with a few moist crumbs — not completely clean.
- Cool Completely: Allow brownies to cool fully before frosting to prevent melting and ensure neat layers.
- Experiment with Toppings: Feel free to add different sprinkles or edible glitter for extra flair!
Best Side Dishes for Wicked Witch Hat Brownies
Pairing side dishes with your Wicked Witch Hat Brownies can elevate your dessert experience. Here are some great options that complement their rich flavors.
- Pumpkin Spice Cookies: Soft cookies infused with pumpkin spice create a seasonal touch alongside brownies.
- Spooky Fruit Salad: A mix of seasonal fruits like apples, oranges, and grapes adds freshness to balance the sweetness.
- Ghostly Marshmallow Treats: Rice cereal treats shaped like ghosts provide a fun, chewy contrast.
- Chocolate Dipped Pretzels: Salty pretzels coated in chocolate offer a savory-sweet combination that pairs well with the brownies.
- Caramel Apple Slices: Fresh apple slices drizzled with caramel sauce bring a crunchy, tangy element.
- Mini Pumpkin Pies: Bite-sized pumpkin pies add an autumnal flavor that complements the chocolaty brownies.
- Cheese Platter: A selection of cheeses can provide a savory contrast, making for an interesting taste experience.
- Spiced Nuts: Roasted nuts seasoned with cinnamon and sugar add crunch and an unexpected twist when served alongside brownies.
Common Mistakes to Avoid
Making Wicked Witch Hat Brownies can be a delightful experience, but there are some common pitfalls to watch out for.
- Boldly skip the cooling time – Allowing the brownies to cool completely before frosting is crucial for a smooth application. If you frost them too soon, the frosting will melt and slide off.
- Boldly ignore measurements – Baking is a science, so precise measurements matter. Use a kitchen scale for accuracy, especially for flour and cocoa powder.
- Boldly overlook oven temperature – Make sure your oven is properly preheated to 350°F (175°C) before baking. An incorrect temperature can lead to undercooked or burnt brownies.
- Boldly forget about the sprinkles – Decorating with Halloween-themed sprinkles adds festive cheer! Don’t skip this fun step; it enhances the visual appeal of your brownies.
- Boldly rush the preparation – Take your time with each step. Rushing can lead to mistakes in mixing or baking times, impacting your final product.
Storage & Reheating Instructions
Refrigerator Storage
- Store Wicked Witch Hat Brownies in an airtight container.
- They can last up to 4-5 days in the refrigerator.
Freezing Wicked Witch Hat Brownies
- Wrap brownies tightly in plastic wrap and then place them in a freezer-safe container.
- They can be frozen for up to 2 months.
Reheating Wicked Witch Hat Brownies
- Oven – Preheat to 350°F (175°C) and warm for about 10 minutes. This restores their fudgy texture.
- Microwave – Heat individual brownies on medium power for 15-20 seconds. Be careful not to overheat!
- Stovetop – Place brownies in a skillet on low heat, covered, until warmed through.
Frequently Asked Questions
Here are some common questions about Wicked Witch Hat Brownies.
What makes Wicked Witch Hat Brownies special?
Wicked Witch Hat Brownies are unique due to their creative presentation as witch hats made from chocolate ice cream cones and festive green frosting that captures the spirit of Halloween.
Can I use different colors of frosting?
Absolutely! While green is traditional for Halloween, feel free to customize your frosting with any color you desire for other occasions.
How do I store leftover Wicked Witch Hat Brownies?
Store them in an airtight container in the refrigerator for up to 4-5 days or freeze them for longer storage.
Are Wicked Witch Hat Brownies suitable for kids?
Yes! These brownies are not only fun to make but also safe and delicious for kids. Just supervise younger children while decorating.
Can I make these brownies gluten-free?
Yes! Substitute all-purpose flour with a gluten-free blend that works well in baking.
Final Thoughts
Wicked Witch Hat Brownies are not just a treat; they’re an imaginative dessert that brings joy during Halloween festivities. The combination of fudgy brownies topped with whimsical witch hats makes them perfect for parties or family gatherings. Feel free to customize the flavors and decorations as per your preference!
Wicked Witch Hat Brownies
- Total Time: 50 minutes
- Yield: 12 servings 1x
Description
Wicked Witch Hat Brownies are the ultimate Halloween delight that combines rich, fudgy brownies with whimsical chocolate ice cream cones to create enchanting witch hats. These festive treats are perfect for Halloween parties, family gatherings, or just a fun baking day at home. With vibrant green frosting and playful sprinkles, they appeal to kids and adults alike, making them a must-try this season. Easy to prepare and highly customizable, these brownies not only satisfy your sweet tooth but also add a spooky touch to your dessert table.
Ingredients
- 1 cup (225g) unsalted butter
- 2 cups (400g) granulated sugar
- 4 large eggs
- 1 teaspoon vanilla extract
- 1 cup (125g) all-purpose flour
- 1 cup (90g) unsweetened cocoa powder
- 1/2 teaspoon salt
- 1/2 teaspoon baking powder
- 12 chocolate ice cream cones
- 2 cups (300g) powdered sugar
- 1/4 cup (60ml) milk
- 1 teaspoon vanilla extract (for frosting)
- Green food coloring
- Halloween-themed sprinkles
Instructions
- Preheat the oven to 350°F (175°C). Melt the unsalted butter and mix it with granulated sugar until smooth. Add eggs one at a time, followed by vanilla extract.
- In a separate bowl, whisk together flour, cocoa powder, salt, and baking powder. Gradually fold this mixture into the wet ingredients until just combined.
- Pour the batter into a greased 9×13-inch baking pan and bake for 25-30 minutes or until a toothpick comes out clean.
- While cooling, dip chocolate ice cream cone tops in melted chocolate and sprinkle with Halloween-themed decorations if desired.
- For the frosting, blend powdered sugar, milk, vanilla extract, and green food coloring until smooth. Spread over cooled brownies.
- Top each brownie with an upside-down chocolate cone and add more sprinkles for decoration.
- Prep Time: 20 minutes
- Cook Time: 30 minutes
- Category: Dessert
- Method: Baking
- Cuisine: American
Nutrition
- Serving Size: 1 serving
- Calories: 275
- Sugar: 24g
- Sodium: 150mg
- Fat: 12g
- Saturated Fat: 7g
- Unsaturated Fat: 4g
- Trans Fat: 0g
- Carbohydrates: 39g
- Fiber: 2g
- Protein: 3g
- Cholesterol: 55mg