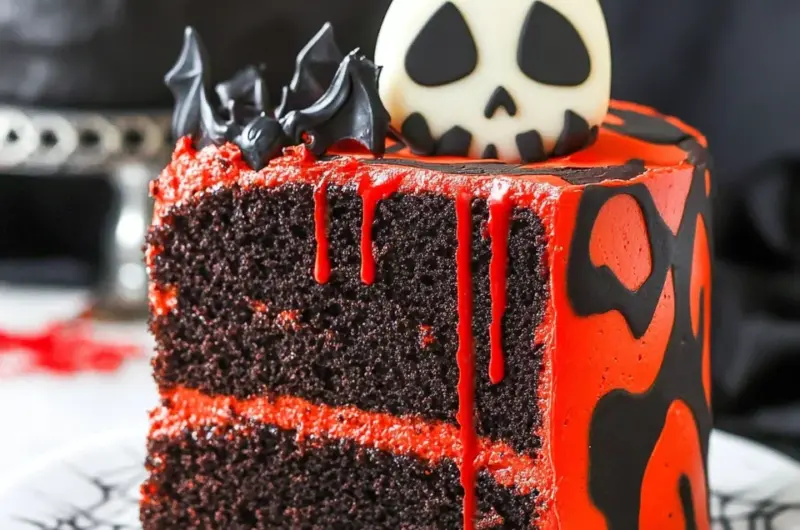
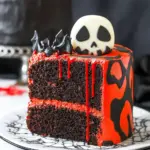
This Spooky Halloween Marble Cake is not only a feast for the eyes but also a delicious treat perfect for your Halloween parties! The striking red and black colors, combined with fun decorations like drippy red blood and spooky sprinkles, make it an unforgettable centerpiece. Whether you’re hosting a gathering or attending a potluck, this cake will surely impress. Its rich flavor and eye-catching design are sure to delight guests of all ages.
Why You’ll Love This Recipe
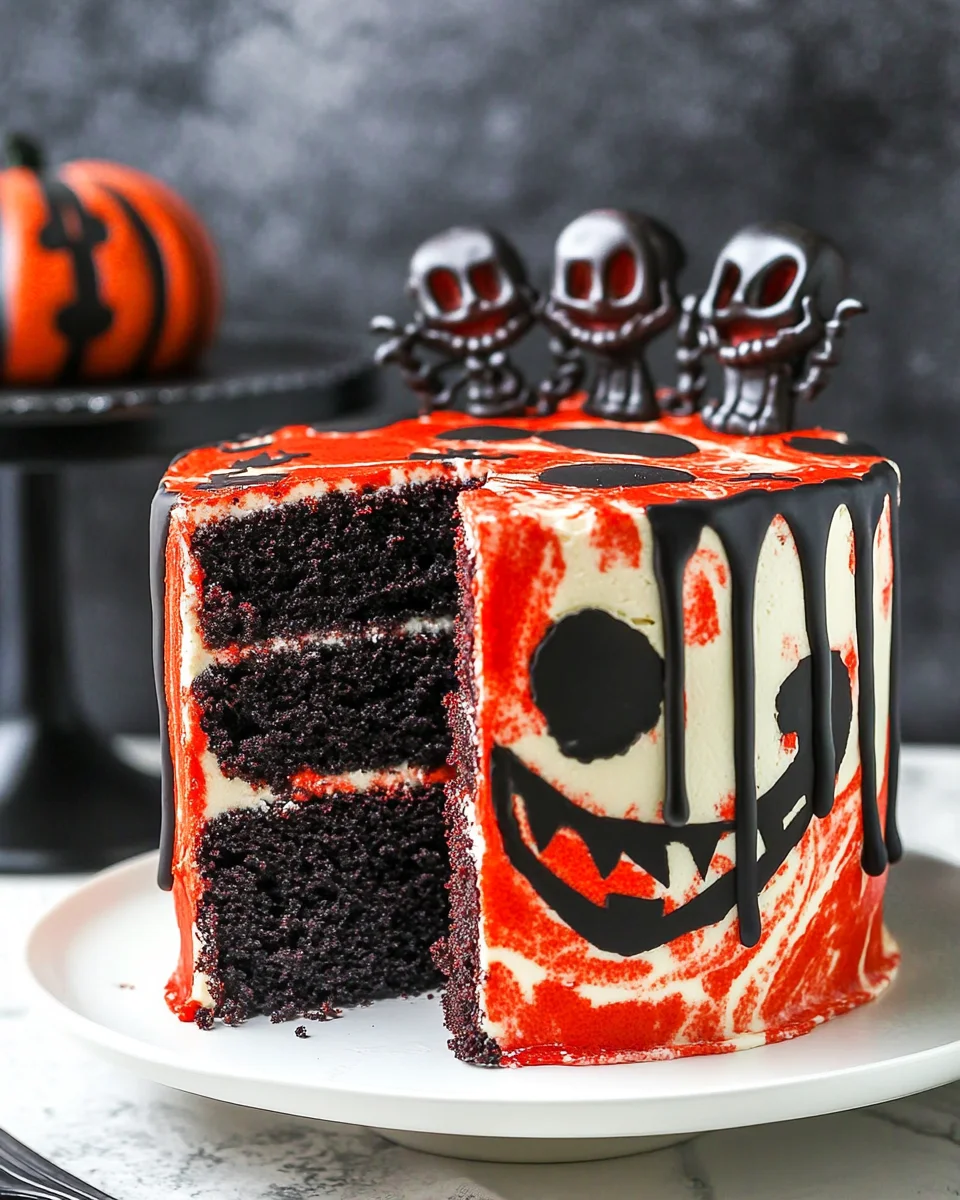
- Visual Appeal: The stunning red and black marbling creates a striking visual that captures the spirit of Halloween.
- Delicious Flavor: With a rich chocolate base and vanilla undertones, every bite is packed with flavor.
- Versatile Decorations: Customize with various spooky toppings to match your Halloween theme perfectly.
- Easy to Follow: Step-by-step instructions make this recipe accessible to bakers of all skill levels.
- Great for Sharing: With 12-14 servings, this cake is perfect for parties or gatherings.
Tools and Preparation
To create the perfect Spooky Halloween Marble Cake, you’ll need some essential tools and equipment. Having the right tools on hand can make your baking experience smoother and more enjoyable.
Essential Tools and Equipment
- Mixing bowls
- Electric mixer
- Measuring cups and spoons
- Rubber spatula
- Baking pans (two 9-inch round)
- Cooling rack
Importance of Each Tool
- Electric mixer: Ensures that your batter is mixed thoroughly and evenly, resulting in a light and fluffy cake.
- Baking pans: Properly sized pans help achieve the correct baking time and even cooking throughout the cake.
- Cooling rack: Allows air circulation around the cake, preventing sogginess as it cools.
Ingredients
To make this delightful Spooky Halloween Marble Cake, gather the following ingredients:
For the Cake
- 2 1/4 cups (293g) all purpose flour
- 2 1/2 tsp baking powder
- 1/4 tsp baking soda
- 1/2 tsp salt
- 1/2 cup (112g) unsalted butter, room temperature
- 1/2 cup vegetable oil
- 1 1/2 cups (310g) sugar
- 1 tbsp vanilla extract
- 4 large eggs
- 1 cup (240ml) buttermilk
- 5 oz bittersweet chocolate (60% cacao), chopped
- Black gel icing color
- Red gel icing color
For the Frosting and Decoration
- 2 1/4 cups (504g) unsalted butter
- 8 cups (920g) powdered sugar
- 1 cup (114g) natural unsweetened cocoa powder
- 2 tsp vanilla extract
- 5-7 tbsp (75-105ml) water/cream
- 1/4 tsp salt
- Black gel icing color
- 4 oz red Wilton candy melts
- 2 tbsp heavy whipping cream
- Sprinkles (see notes)
How to Make Spooky Halloween Marble Cake
Step 1: Prepare Your Oven and Pans
Preheat your oven to 350°F (175°C). Grease two 9-inch round baking pans with butter or oil and line the bottoms with parchment paper for easy removal.
Step 2: Mix Dry Ingredients
In a mixing bowl, whisk together:
* Flour
* Baking powder
* Baking soda
* Salt
Set aside.
Step 3: Cream Butter and Sugar
In another bowl, beat together:
* Unsalted butter
* Vegetable oil
* Sugar
Beat on medium speed until light and fluffy. This should take about 3–5 minutes.
Step 4: Add Eggs and Vanilla
Add eggs one at a time, mixing well after each addition. Then stir in vanilla extract.
Step 5: Combine Wet Ingredients
Add buttermilk gradually into the mixture while beating on low speed until fully incorporated.
Step 6: Melt Chocolate
Melt bittersweet chocolate using a microwave or double boiler until smooth. Allow it to cool slightly before adding it to the batter.
Step 7: Combine Dry with Wet Ingredients
Gradually add your dry ingredient mixture into the wet ingredients. Mix just until combined; avoid overmixing.
Step 8: Create Marble Effect
Divide batter into two bowls. Color one part black using gel icing color and leave the other part as is. Alternate spoonfuls of both batters into prepared pans. Use a knife or skewer to swirl through for a marbled effect.
Step 9: Bake
Bake in preheated oven for about 20 minutes or until a toothpick inserted in center comes out clean.
Step 10: Cool
Remove cakes from oven. Let them cool in pans for about 10 minutes before transferring them onto cooling racks to cool completely.
Continue with frosting instructions in subsequent sections to complete your spooky masterpiece!
How to Serve Spooky Halloween Marble Cake
Serving your Spooky Halloween Marble Cake can be a fun and creative experience. Here are some ideas to make your presentation as delightful as the cake itself.
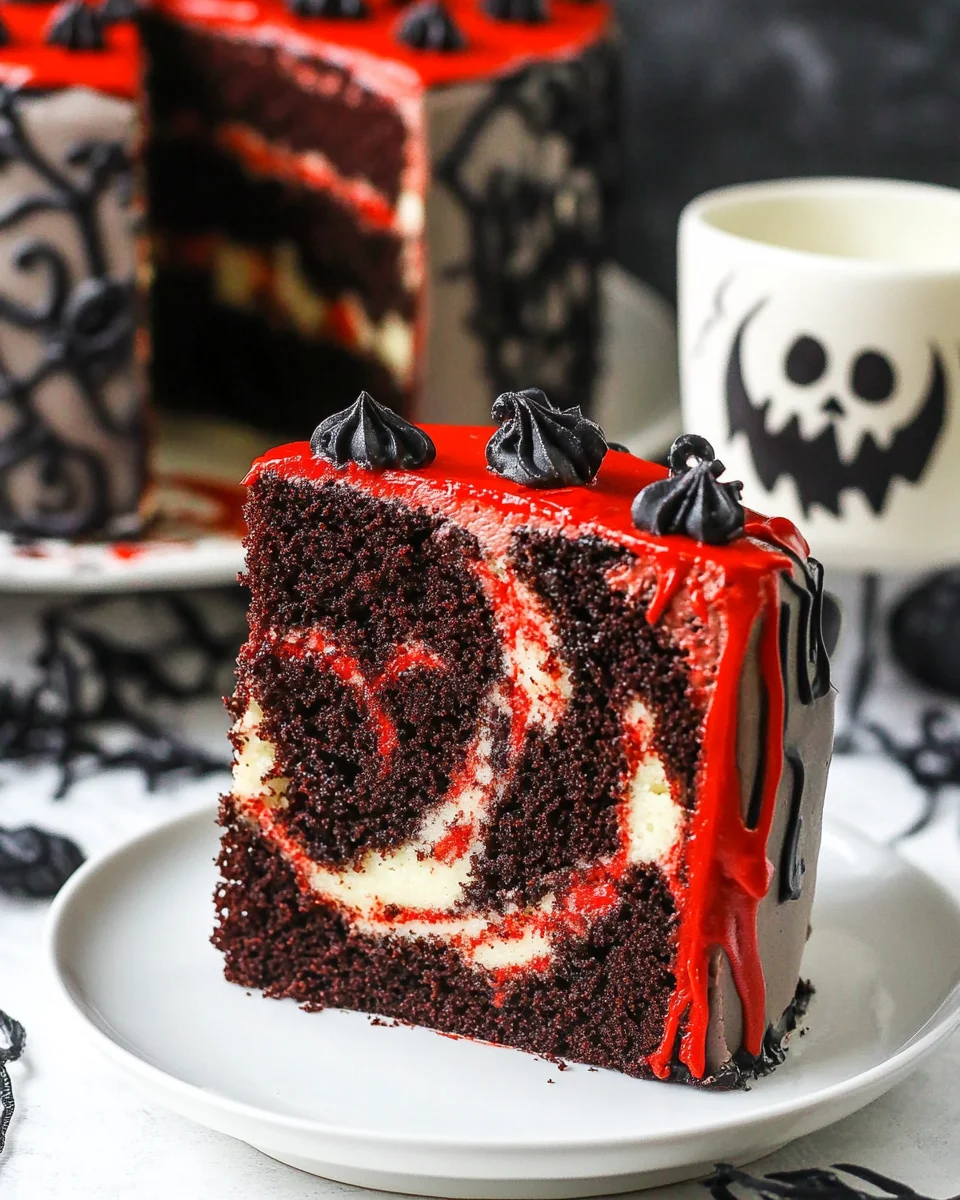
Festive Cake Slices
- Cut the cake into generous slices and serve on themed plates featuring Halloween designs. Add a small dollop of whipped cream or plant-based cream on the side for a creamy touch.
Haunted Cake Stand
- Display your cake on a tiered cake stand draped with spooky spider webs (cotton candy works great!). This elevates the cake, making it the centerpiece of your Halloween spread.
Cupcake Versions
- Transform leftover cake batter into cupcakes! Use black and red liners to match the spooky theme. Top with the same blood-red icing for a bite-sized treat.
Witches’ Brew Parfaits
- Layer pieces of the marble cake in clear cups with chocolate pudding or mousse. Top with sprinkles and serve as individual desserts, making them perfect for parties.
Scary Cake Pops
- Crumble leftover cake and mix it with icing to create cake pops. Dip them in red candy melts and add spooky decorations like edible eyes or black sprinkles.
Themed Dessert Table
- Create a dessert table filled with other Halloween treats alongside your marble cake. Include items like ghost-shaped cookies or pumpkin-flavored snacks for a variety of flavors.
How to Perfect Spooky Halloween Marble Cake
To ensure your Spooky Halloween Marble Cake turns out perfectly, keep these tips in mind:
-
Use Room Temperature Ingredients: Bringing butter, eggs, and buttermilk to room temperature helps create an evenly mixed batter, resulting in a moist cake.
-
Sift Dry Ingredients: Sifting flour and cocoa powder removes lumps and aerates the mixture, ensuring a light texture in your finished cake.
-
Don’t Overmix: Mix just until combined when adding dry ingredients to the wet mixture. Overmixing can lead to a dense cake.
-
Check Oven Temperature: Invest in an oven thermometer. Baking at the correct temperature is crucial for achieving that perfect rise and texture.
-
Cool Properly: Allow the cakes to cool completely before frosting. This prevents the icing from melting and ensures clean edges when serving.
-
Add Fun Decorations: Use black and red gel icing colors creatively to enhance the spooky look of your cake. Play around with sprinkles for added flair!
Best Side Dishes for Spooky Halloween Marble Cake
Pair your delicious Spooky Halloween Marble Cake with these delightful side dishes that will complement its flavors beautifully:
-
Pumpkin Soup: A warm, spiced soup that adds a comforting touch to your dessert table while keeping with the fall theme.
-
Crispy Kale Chips: Lightly salted kale chips offer a crunchy contrast that balances the sweetness of the cake without overwhelming it.
-
Apple Cider Salad: A refreshing salad made with mixed greens, sliced apples, walnuts, and a tangy dressing—perfect for autumn gatherings.
-
Chocolate-Dipped Fruit: Fresh strawberries or bananas dipped in dark chocolate can provide a sweet yet healthier option alongside rich dessert flavors.
-
Spicy Roasted Nuts: A bowl of savory roasted nuts seasoned with spices adds an exciting crunch that guests will love as they dive into their slices of cake.
-
Cheese Platter: An assortment of cheeses paired with crackers creates an elegant touch that offers balance against sweet desserts like marble cake.
-
Caramel Popcorn: Sweet, crunchy popcorn drizzled with caramel makes for an irresistible snack that guests can munch on throughout the celebration.
-
Gingerbread Cookies: These spiced cookies capture autumn flavors and are easy to decorate—perfect for adding extra festivity to your party table!
Common Mistakes to Avoid
Creating a Spooky Halloween Marble Cake can be fun, but there are a few common pitfalls to watch out for. Here are some mistakes to avoid:
- Not measuring ingredients accurately: Always use precise measurements for flour, sugar, and other ingredients. This will ensure your cake has the right texture and flavor.
- Overmixing the batter: Mix just until ingredients are combined to maintain a light and fluffy cake. Overmixing can lead to a dense texture.
- Skipping the cooling time: Let your cake cool completely before decorating. If you frost it too soon, the icing may melt or slide off.
- Ignoring gel color instructions: Use gel colors sparingly for deep colors without altering the batter consistency. Too much liquid can affect the cake’s rise and texture.
- Choosing the wrong baking pan: Ensure you use the recommended size of pan. A pan that’s too small may overflow, while one that’s too large can lead to uneven baking.
Storage & Reheating Instructions
Refrigerator Storage
- Store the cake in an airtight container in the refrigerator.
- It will stay fresh for up to 5 days.
Freezing Spooky Halloween Marble Cake
- Wrap individual slices in plastic wrap and place them in a freezer-safe bag.
- The cake can be frozen for up to 3 months.
Reheating Spooky Halloween Marble Cake
- Oven: Preheat your oven to 350°F (175°C). Place the slice on a baking sheet and heat for about 10-15 minutes.
- Microwave: Heat on medium power for about 20-30 seconds. Check frequently to avoid overheating.
- Stovetop: Place a slice in a non-stick skillet over low heat, cover, and warm for about 5 minutes.
Frequently Asked Questions
Here are some common questions about making the Spooky Halloween Marble Cake.
How do I make my Spooky Halloween Marble Cake more moist?
Adding an extra egg or substituting sour cream for part of the buttermilk can increase moisture levels in your cake.
Can I use different colors for my Halloween Marble Cake?
Absolutely! Feel free to experiment with other gel icing colors to create unique patterns that fit your Halloween theme.
How should I decorate my Spooky Halloween Marble Cake?
Consider using themed sprinkles, edible glitter, or even fondant decorations like ghosts and pumpkins to enhance its spooky appeal.
Can I make this recipe vegan?
To make it vegan, substitute eggs with flaxseed meal and use plant-based butter and milk alternatives.
Final Thoughts
The Spooky Halloween Marble Cake is not only visually stunning but also deliciously versatile. You can customize it with different colors or toppings based on your creativity! Try this recipe at your next gathering; it’s sure to impress both kids and adults alike!
Spooky Halloween Marble Cake
- Total Time: 50 minutes
- Yield: Approximately 12 servings 1x
Description
Create a spooky sensation at your Halloween gathering with this Spooky Halloween Marble Cake! This eye-catching dessert features a rich chocolate and vanilla flavor profile, beautifully marbled in striking red and black hues. Decorated with drippy red icing and festive sprinkles, it serves as both a delicious treat and a stunning centerpiece. Perfect for parties or potlucks, this cake will impress guests of all ages with its delightful taste and creative presentation. Easy to make with step-by-step instructions, you’ll love sharing this festive masterpiece at your next celebration!
Ingredients
- 2 1/4 cups (293g) all purpose flour
- 2 1/2 tsp baking powder
- 1/4 tsp baking soda
- 1/2 tsp salt
- 1/2 cup (112g) unsalted butter, room temperature
- 1/2 cup vegetable oil
- 1 1/2 cups (310g) sugar
- 1 tbsp vanilla extract
- 4 large eggs
- 1 cup (240ml) buttermilk
- 5 oz bittersweet chocolate (60% cacao), chopped
- Black gel icing color
- Red gel icing color
- 2 1/4 cups (504g) unsalted butter for frosting
- 8 cups (920g) powdered sugar
- 1 cup (114g) natural unsweetened cocoa powder
- 2 tsp vanilla extract for frosting
- 5–7 tbsp (75-105ml) water
- 1/4 tsp salt for frosting
- Black gel icing color for decoration
- 4 oz red Wilton candy melts for decoration
- 2 tbsp heavy whipping cream for decoration
- Sprinkles for decoration
Instructions
- Preheat your oven to 350°F (175°C). Grease two 9-inch round baking pans and line them with parchment paper.
- In a mixing bowl, whisk together flour, baking powder, baking soda, and salt. Set aside.
- In another bowl, beat unsalted butter, vegetable oil, and sugar until fluffy. Add eggs one at a time, then mix in vanilla extract.
- Gradually incorporate buttermilk into the mixture.
- Melt bittersweet chocolate; let cool slightly before adding it to the batter.
- Combine dry ingredients with wet ingredients until just mixed.
- Divide batter into two bowls; color one part black using gel icing color.
- Alternate spoonfuls of each batter into prepared pans and swirl with a knife for a marbled effect.
- Bake for about 20 minutes or until a toothpick comes out clean. Let cool completely before frosting.
- Prep Time: 30 minutes
- Cook Time: 20 minutes
- Category: Dessert
- Method: Baking
- Cuisine: American
Nutrition
- Serving Size: 1 slice (100g)
- Calories: 450
- Sugar: 45g
- Sodium: 210mg
- Fat: 22g
- Saturated Fat: 10g
- Unsaturated Fat: 11g
- Trans Fat: 0g
- Carbohydrates: 58g
- Fiber: 2g
- Protein: 5g
- Cholesterol: 55mg